A Step-by-Step Guide to Water Heater Installation: Everything You Need to Know
Introduction:
Installing a water heater may seem like a complex task, but with the right knowledge and guidance, it can be done successfully. In this comprehensive guide, we will take you through the step-by-step process of water heater installation, covering everything you need to know. From preparing your space to connecting the necessary components, we’ve got you covered.
1. Assessing Your Needs:
Before diving into the installation process, it’s important to assess your needs and choose the right water heater for your household. Consider factors such as the size of your family, hot water usage, and energy efficiency. This will help you determine whether a tankless, storage tank, or hybrid water heater is the best fit for your requirements.
2. Gathering the Necessary Tools and Materials:
To ensure a smooth installation, gather all the tools and materials you’ll need beforehand. This includes a pipe wrench, adjustable wrench, tubing cutter, pipe cutter, soldering torch, pipe fittings, Teflon tape, pipe insulation, and a pressure relief valve. Having these items readily available will save you time during the installation process.
3. Preparing the Installation Area:
Now that you have your water heater and tools ready, it’s time to prepare the installation area. Start by turning off the power supply to the existing water heater. Ensure the area is well-ventilated and clear of any obstructions. If you’re replacing an old unit, drain it completely before disconnecting it from the plumbing system.
4. Disconnecting the Old Water Heater:
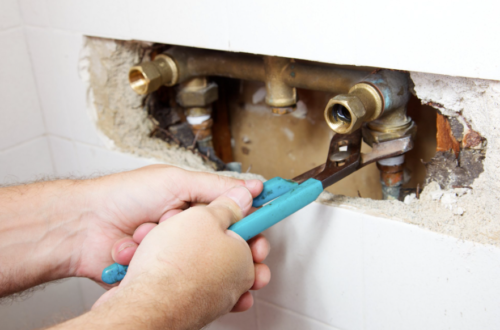
If you’re replacing an existing water heater, begin by disconnecting it from the plumbing system. Turn off the water supply and use a pipe wrench or adjustable wrench to remove the connections. Take caution as the water heater may still contain hot water. Once disconnected, drain any remaining water into a suitable container or drain.
5. Installing the New Water Heater:
Begin the installation process by placing the new water heater in the designated area. Ensure it is level and stable before proceeding. Connect the cold water supply line to the inlet valve and the hot water outlet line to the corresponding outlet valve. Use Teflon tape or pipe joint compound to secure the connections and prevent leaks.
6. Venting the Water Heater:
Proper venting is essential for the safe operation of your water heater. Depending on the type of unit you have, you may need to install vent pipes to direct exhaust gases outside. Follow the manufacturer’s instructions to ensure correct placement and sizing of the vent pipes. Improper venting can lead to the buildup of harmful gases, posing a risk to your household.
7. Connecting the Gas Supply (if applicable):
If you have a gas water heater, it’s important to connect the gas supply correctly. Use a pipe wrench to attach the gas line to the gas control valve on the water heater. Apply a solution of soapy water to the connections and check for any leaks. If bubbles appear, tighten the connections further or consult a professional for assistance.
8. Electrical Connections (if applicable):
For electric water heaters, proper electrical connections are crucial. Follow the manufacturer’s instructions to connect the wiring correctly. This may involve removing access panels, connecting wires to terminals, and ensuring proper grounding. If you’re unsure about electrical work, it’s best to consult a licensed electrician for assistance.
9. Filling and Testing the Water Heater:
Once all the connections are in place, it’s time to fill the water heater and test its functionality. Open a hot water faucet in your home to allow air to escape from the system. Slowly turn on the water supply and monitor the water heater for any leaks. Once the tank is full, switch on the power supply or gas, depending on the type of unit, and allow the water to heat up.
10. FAQs Section:
a. How long does it take to install a water heater?
– On average, a water heater installation can take anywhere from two to four hours, depending on the complexity of the project and any additional modifications required.
b. Can I install a water heater myself?
– While it is possible to install a water heater yourself, it is recommended to hire a professional plumber or contractor. They have the expertise and knowledge to ensure a safe and efficient installation.
c. How often should I replace my water heater?
– The lifespan of a water heater typically ranges from 8 to 12 years. However, factors such as usage, maintenance, and water quality can affect its longevity. It’s best to monitor the performance of your water heater and consider replacement if it shows signs of inefficiency or frequent breakdowns.
d. Are there any safety precautions I should take during installation?
– Yes, safety should be a top priority during water heater installation. Ensure the power and gas supply are turned off before starting any work. Take caution while handling hot water and use appropriate safety gear, such as gloves and eye protection. If you’re unsure about any aspect of the installation, seek professional assistance.
Conclusion:
Installing a water heater may seem daunting, but by following this step-by-step guide, you can successfully complete the process. Remember to assess your needs, gather the necessary tools and materials, and carefully follow the manufacturer’s instructions. If you’re unsure or uncomfortable with any aspect of the installation, it’s always best to consult a professional. Stay safe and enjoy the benefits of a properly installed water heater.
For more information on water heater installation, check out this informative article: [Insert External Link].


