The Ultimate Guide to Bathtub Installation: A Step-by-Step Process
Installing a bathtub requires careful planning and execution to ensure a successful outcome. Whether you’re replacing an old bathtub or installing a new one, this comprehensive guide will take you through each step of the process, providing valuable insights and tips along the way.
Step 1: Preparing for Installation
Before you begin the installation, it’s crucial to gather all the necessary tools and materials. This includes the bathtub itself, plumbing fixtures, drain, caulking gun, screws, and a level. Measure the dimensions of your bathroom to ensure the new bathtub will fit properly.
Next, shut off the water supply to the bathroom and remove any existing fixtures, such as the old bathtub, showerhead, and faucets. Inspect the plumbing for any leaks or issues that may need to be addressed before installation.
Step 2: Positioning the Bathtub
Once you have prepared the area, carefully position the new bathtub in the desired location. Ensure that it is level and aligned with the walls. Use shims if necessary to achieve a perfectly level installation. Secure the bathtub in place using screws or brackets.
At this stage, it’s crucial to connect the bathtub drain to the existing plumbing system. Follow the manufacturer’s instructions for proper installation and ensure a watertight connection.
Step 3: Installing the Surrounding Walls
After securing the bathtub, it’s time to install the surrounding walls. Depending on your preferences and bathroom design, you can choose from various options such as tiles, fiberglass panels, or waterproof drywall. Ensure that the walls are properly sealed to prevent water damage.
When installing the walls, pay attention to any cutouts required for plumbing fixtures, such as faucets and showerheads. Use a waterproof adhesive or mortar to secure the tiles or panels in place.
Step 4: Plumbing and Fixtures Installation
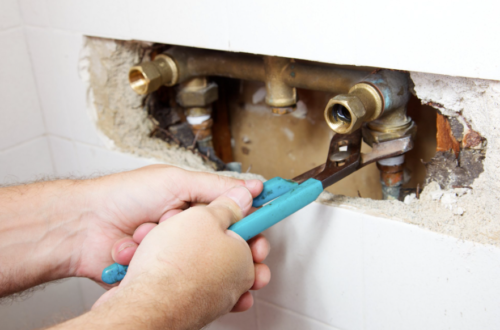
With the bathtub and walls in place, it’s time to connect the plumbing fixtures. Install the faucets, showerhead, and any other accessories according to the manufacturer’s instructions. Ensure that all connections are tight and leak-free.
Once the fixtures are in place, test the water supply by turning it on and checking for any leaks. If you notice any issues, make the necessary adjustments or seek professional help to ensure the proper functioning of your bathtub.
Step 5: Finishing Touches
After completing the installation and ensuring everything is in working order, it’s time to add the finishing touches. Apply a high-quality silicone caulk around the edges of the bathtub to create a watertight seal. This will prevent water from seeping into the walls and causing damage.
Clean the bathtub thoroughly, removing any debris or residue left from the installation process. Wipe down the surrounding walls and ensure all surfaces are clean and dry.
FAQs
1. How long does it take to install a bathtub?
The time required for bathtub installation can vary depending on factors such as the complexity of the project and the skill level of the installer. On average, it can take anywhere from a few hours to a full day to complete the installation process.
2. Can I install a bathtub myself, or should I hire a professional?
While it is possible to install a bathtub yourself, it is recommended to hire a professional if you lack experience or knowledge in plumbing and construction. Hiring a professional ensures that the installation is done correctly and reduces the risk of potential issues in the future.
3. How much does bathtub installation cost?
The cost of bathtub installation can vary depending on factors such as the type of bathtub, complexity of the project, and location. On average, the cost can range from $500 to $3,000, including materials and labor. It is advisable to obtain quotes from multiple professionals to get an accurate estimate for your specific project.
For more detailed information on bathtub installation, you can refer to this detailed guide that provides step-by-step instructions and additional tips.


