
If the water flow from your shower head is decreasing, then there is a certain chance that mold and mineral deposits might be growing in the shower. Homeowners usually don’t know how to clean a shower head in their bathroom to deal with this problem.
You may try to clean it by simply rubbing the nozzles to get the spray jets, but you can’t increase water pressure.
Never get confused! Here you will get the deep cleaning solution to this problem with minimum effort and time.
You can restore the stream of water without any commercial cleaner and eliminate the mineral deposits and other messy particles from the shower head without any complication.
If you haven’t tried to clean a shower head on your own, follow the thorough cleaning steps mentioned in this guide to keep the right water flow from your shower head.
How Often Do You Need to Clean a Shower Head?
If you notice a reduced water flow, you have to do this cleaning job instantly. It means that lots of minerals and other particles stop the water flow. Another risky aspect here is that mold might grow up inside the shower.
You have to take action and call the professional cleaner immediately or plan a thorough cleaning session for your shower cap. It is great to do this cleaning exercise once in 6 months.
If you reside in a hard water area, you have to take care of this cleaning process and might schedule it every month.
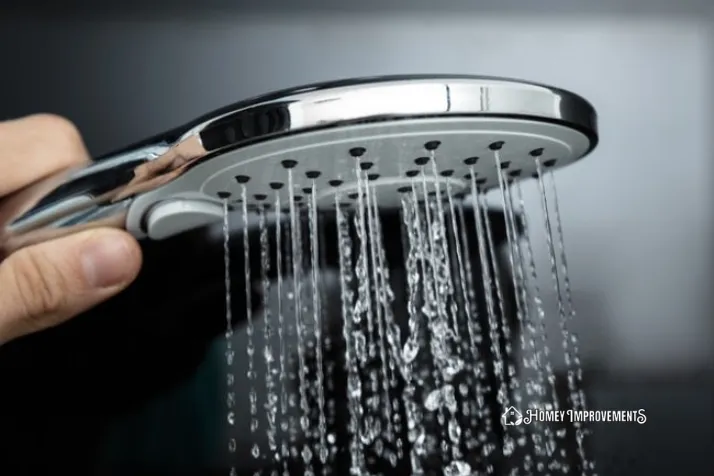
Regular cleanings of the shower will discourage mildew from growing up. You will get the right flow of water from your shower head
Tools and Materials Required
- Pitcher
- Baking soda
- 4 cups of white vinegar
- Toothpick or paper clip
- Cleaning cloth
- Gallon-size plastic bag
- Rubber bands
- Lockable pliers or wrench
- Needle-nose pliers
Best Way to Clean Shower Head – Step by Step Guide
The easiest way to clean the shower head is to skip some steps and clean this gear with a little trick. You can soak the shower head in vinegar without removing it. Simply fill a plastic bag with the vinegar solution and secure it with rubber bands on the shower head.
The vinegar ingredient will do its job and remove all the messes from the mineral stream shower head. You need to wait for at least one hour and remove the bag. Now flush the water and wipe the shower head out with a soft cloth.
You will get a neat and spotless shower head. But wait! There is a certain chance that the flow of running water is still slow, and you can’t get the right quantity of water from all nozzles of your shower head, and you might consider a replacement.
To fix these issues, you need a deep cleaning session of your shower head. Before considering a replacement of your shower head; you must try the following steps at once to clean the shower head:
Step 1. Inspect the Shower Head
There is a huge variety of mineral shower head products and can be categorized in terms of their construction, water flow type, material, shower bead, and even showerhead filter.

It is necessary to examine all these factors of your shower head before starting to clean it. If you have a better understanding of this gadget, you can clean it in a better way.
If your showerhead is made with durable material, you can wash it with any commercial shower head cleaner, but here again, the best showerhead can be cleaned with the help of natural ingredients.
Step 2. Disconnect the Shower Head and Rinse it with Fresh Water
The best way to clean a shower is to do a deep cleaning session after removing it from its actual position. Unscrew the nuts from the arm of your shower and disconnect it.
Never try to force with your hand; rather wrench is a better option. The best shower heads with filters are not very sturdy; they are installed to match the entire design of your bathroom, so it is better to avoid too much strength to save it from scratches.
The shower head for hard water may contain so many minerals and other particles, so it’s great to rinse this gadget with fresh water before this shower cleaning process.
Step 3. Dismantle It!
You might see some additional deposits in this shower head, so you need to eliminate them by poking with any safety pin or toothpick.

You can dismantle these particles with a finger and pull them out from the showerhead if you see minerals and calcium. Plastic nubbin is another good option here to use for this purpose.
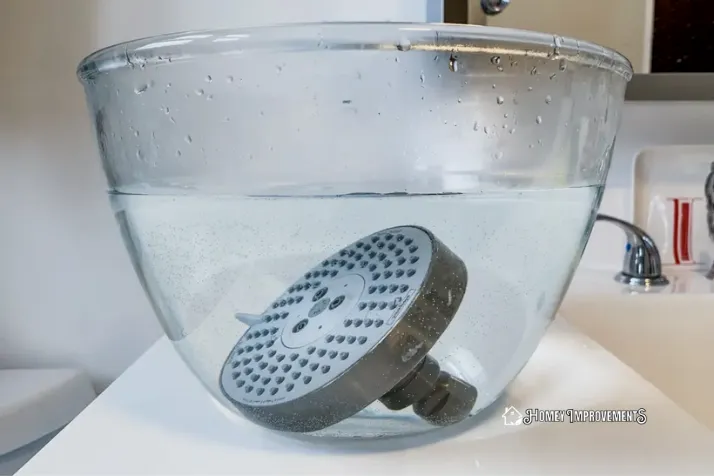
Step 4. The Soaking Method
The soaking shower head in vinegar solution is the best way to clean a shower head and dissolve these deposits. Now you have the tidy shower head in your hand.
You have to mix a few cups of vinegar in warm water and put this gadget in this solution to soak it for several hours. If you find it dirtier, you can live it overnight. If you have Zenbody’s shower head, 30 minutes is enough to soak this type of gadget in this solution.
This cleaning of the shower head with vinegar doesn’t need any scrubbing or spot stain removal exercise. Rather the solution removes all the hurdles or messes from the nozzles of a shower by itself.
Reassemble and Re-install the Shower Head
Once you have applied the clean shower head vinegar technique and cleaned the pipe of a shower, you are confident enough to re-attach it again, reassemble all the shower components, and put it again to its actual position.

You can use a lockable plier or wrench again and gently move the shower head in an anti-clock direction to fix it. Do not try to tighten it too hard or too loose. Just make sure that it holds its position with reasonable strength.
Top Tips for Cleaning Shower Head
You can steady the pressure of running water from your shower head and keep it away from germ growth by observing the following cleaning tips:
- If you want to maintain a proper flow of water from your shower head, then follow the advice given here:
- Never try to use a brush with stiff bristles or a nylon brush. It will damage the metal finish of your shower head.
- Install a water softener at any spot of the water supply of your shower head. It will trap all the minerals and harder ingredients in water, and the blockage issue will decrease to a greater extent.
- Bleach or a similar nature cleaner is absolutely not recommended here, but if you are doing this cleaning job with harsh chemicals or any cleaner with strong fumes, do this task in a well-ventilated space.
- Inspect the shower head and the running water from it before starting to remove or clean it.
- If you have flexible rubber nozzles in your shower head, then scrub these nozzles with gentle hands.
- Kill the mold from your shower head instantly to enjoy fresh and clean water.
- It is better to do the soaking process after removing the shower head.
- Reattach this shower head to its actual position and test it after cleaning this shower head.
Conclusion
If you have reduced water pressure in your shower head, you can’t think about its replacement. This issue may be raised just because of minerals or other deposits. You can fix such minor problems with a DIY attitude and clean the shower head with the help of five easy steps.
This guide will help you clean a shower head with minimum afford and time. You never need any complex tools or expensive commercial cleaners of Delime; rather, this cleaning job can be done with natural ingredients for any type of shower head.
You can schedule this cleaning task every month or can instantly tackle any messy situation on your own.


