
")
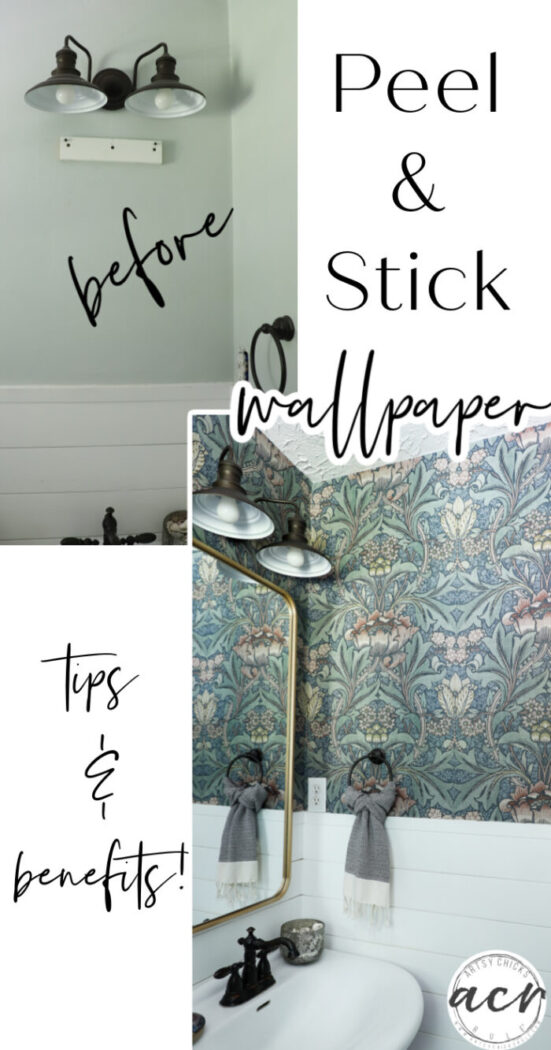
How to hang peel and stick wallpaper plus tips and reasons why you should!
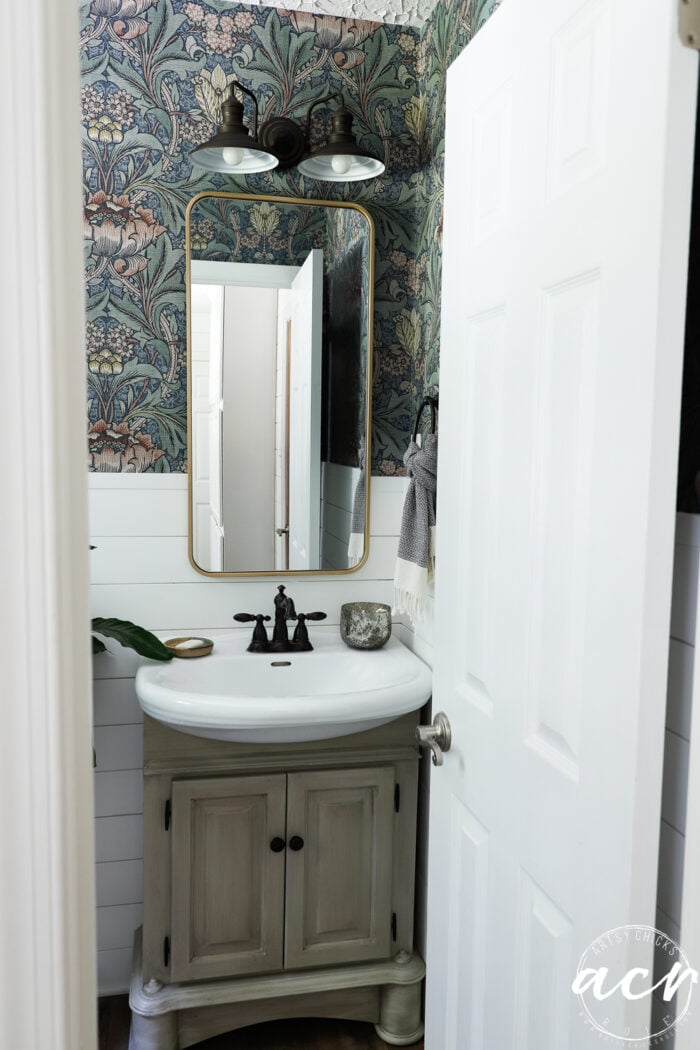
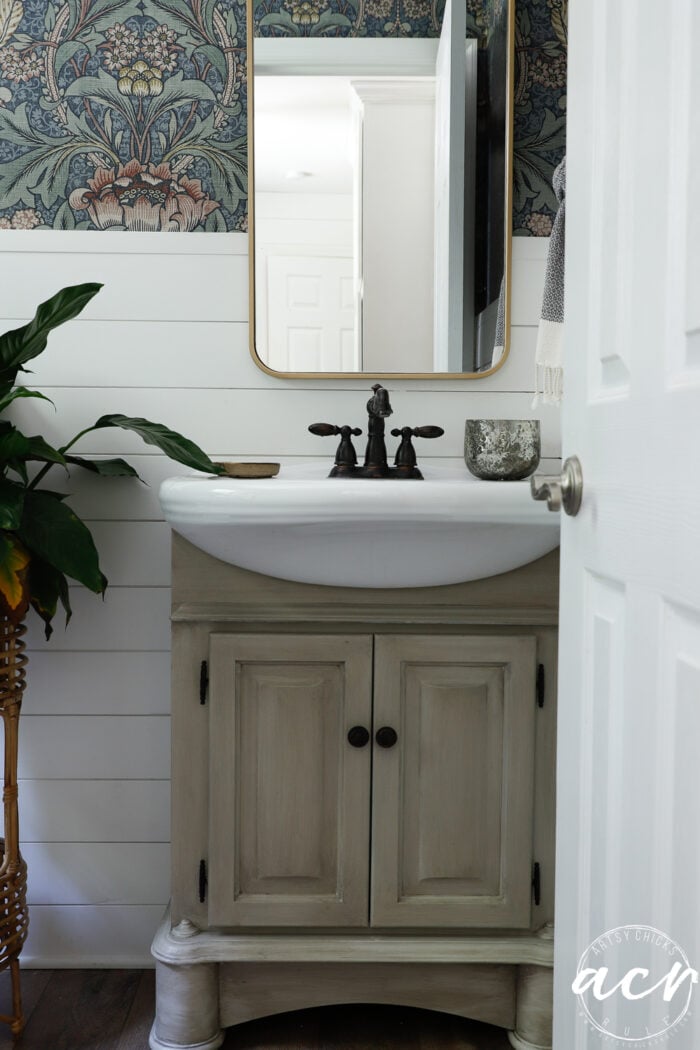
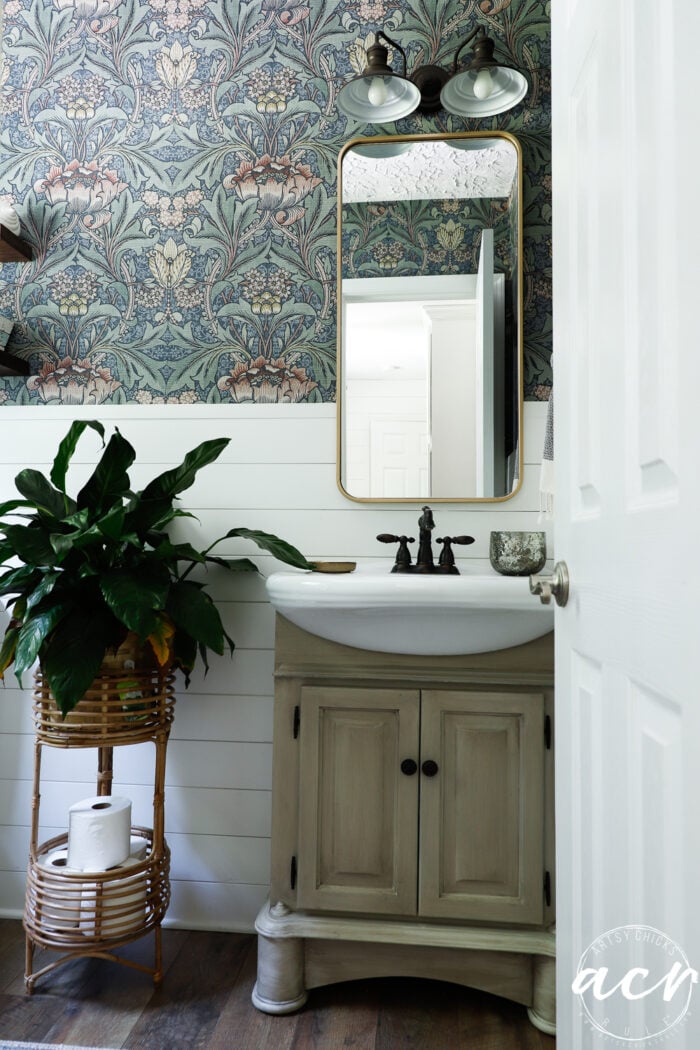
Hello friends! I’m back today sharing our downstairs guest bath.
I mentioned on Tuesday that I had also finished wallpapering this room too. If you missed that post, it’s the one where I painted our foyer ceiling darker. You can see it here.
And all of these changes I am planning in our home is in this post here. (<<< you can also see all the other wallpaper choices I was considering for this guest bath…and yes, one of the ones I showed is one I picked!)
I’m going to share a few tips on hanging peel and stick wallpaper, plus basically how to hang peel and stick wallpaper too. It’s pretty basic but there are a few things to keep in mind. I’ll share a few tips too.
How To Hang Peel and Stick Wallpaper (and more importantly…why I chose it! And why you might want to too.)
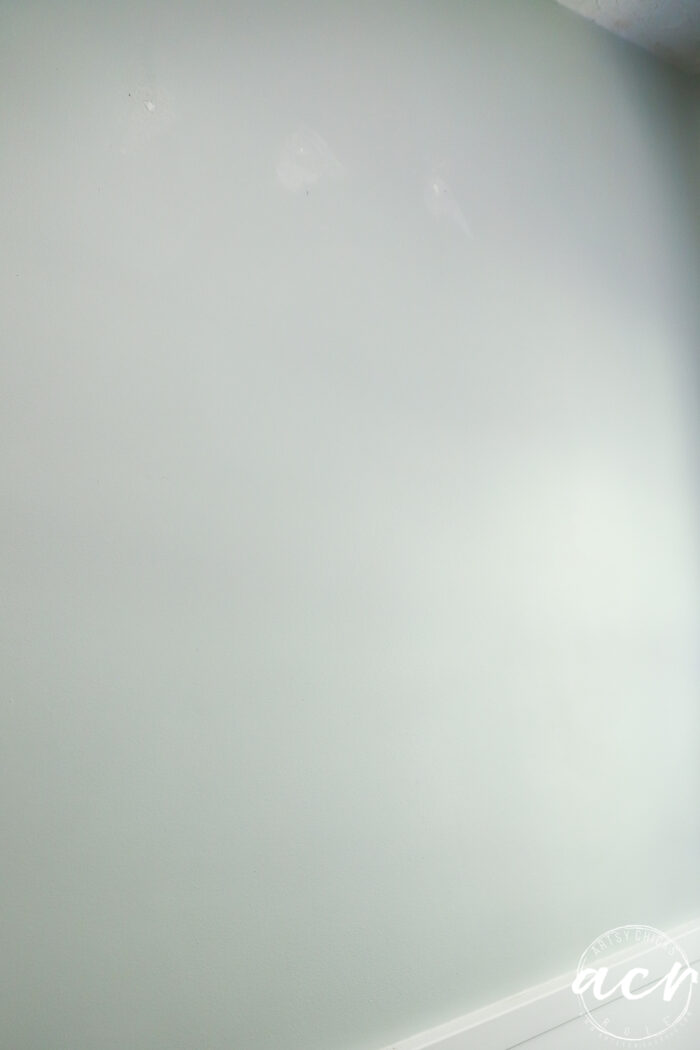
Here is our bathroom “before”. (well, after I gave it 3 different makeovers since moving in years ago!)
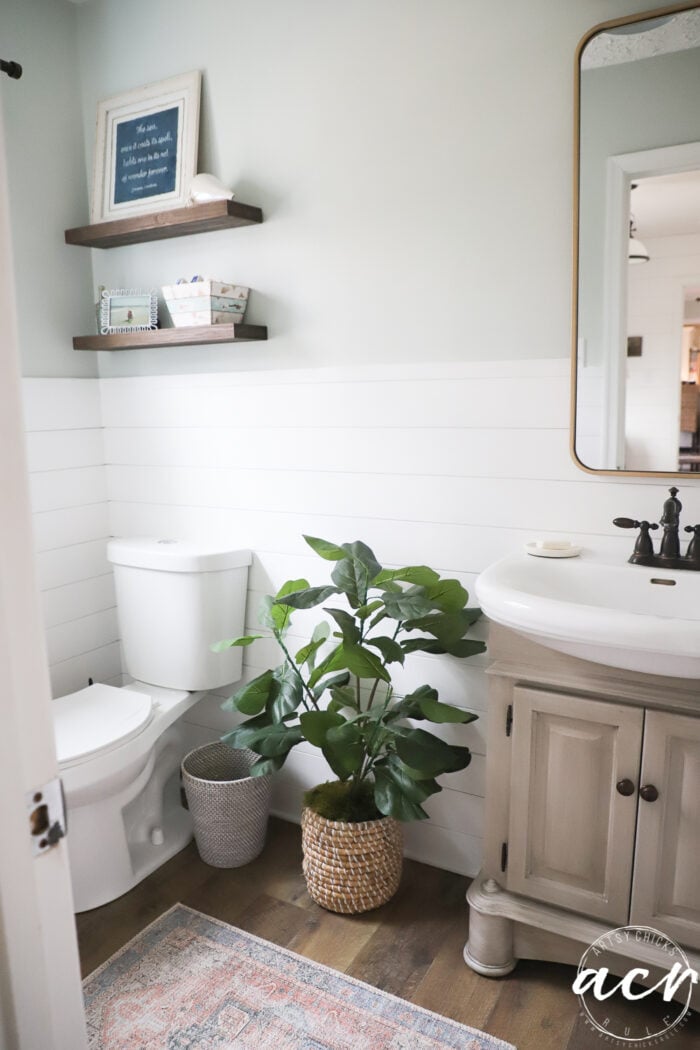
I love (love, love!) the Sea Salt paint and the light, bright airy feel of it. I love how “spa-like” it is. BUT I am ready for a change.
I want something a little more, oh, I don’t know, elegant, snazzy?? Different. Just different.
And you know what?? Peel and stick wallpaper fits that bill! No painting…and no real wallpaper mess to deal with.
You know what that means?? No real wallpaper to remove once I’m ready for another change!! Ha!! And bonus, I’ll just peel this right back off and my pretty Sea Salt walls will still be under here to shine again when I’m ready.
That’s the first reason why you should consider peel and stick wallpaper.
It’s fun and it adds style, change and more. Then you can take it right back off easily when you are ready for another change…or just want to go back to what you had before. Love that!
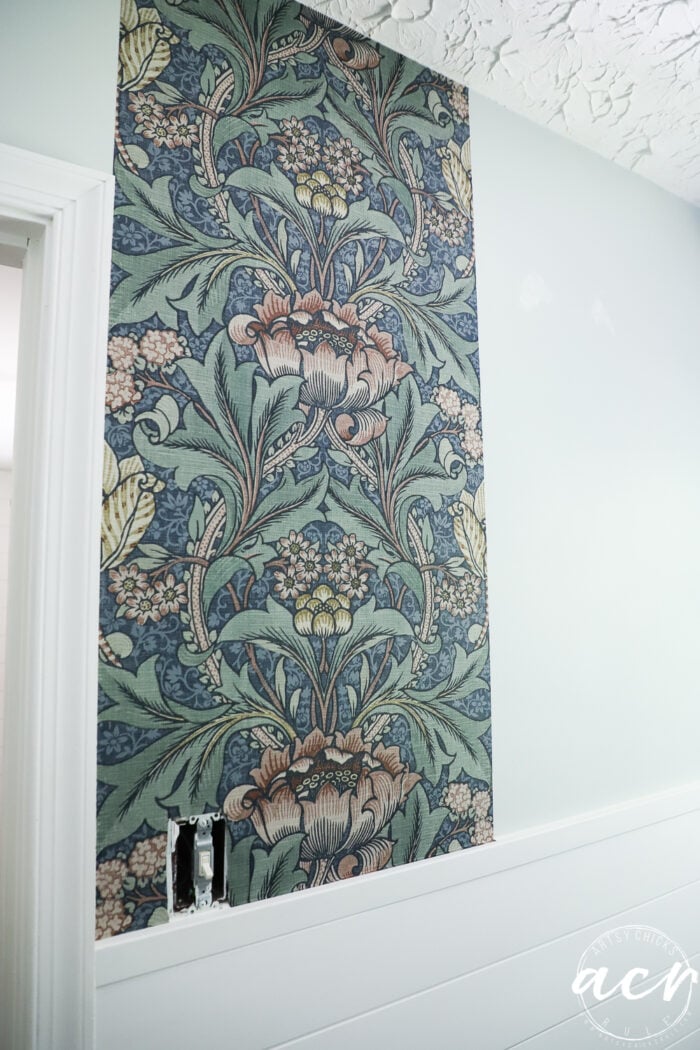
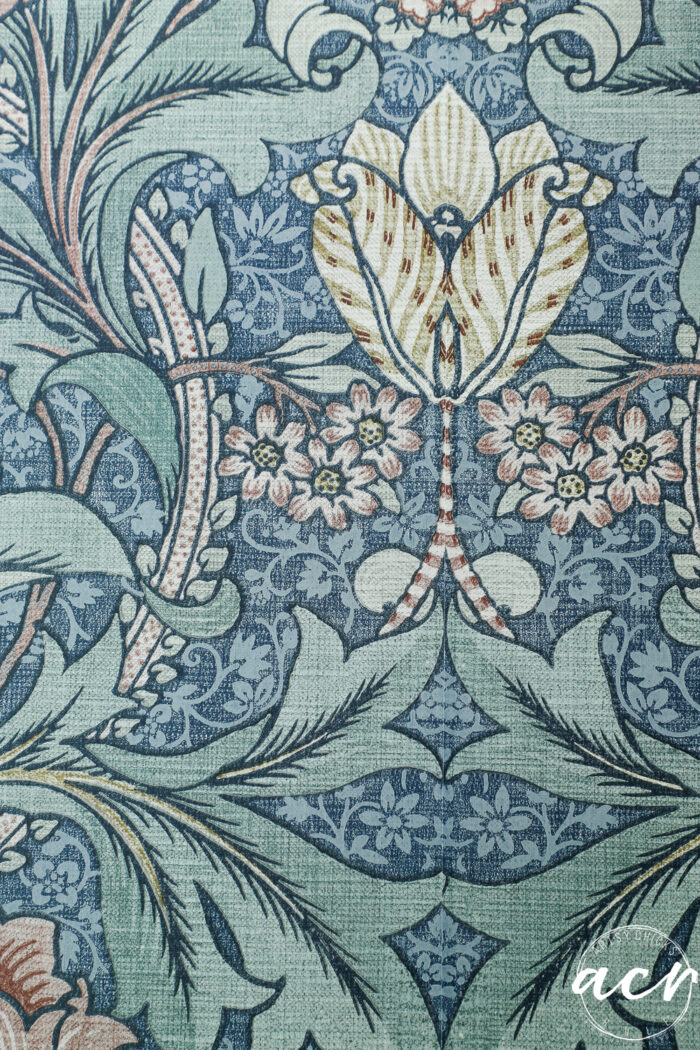
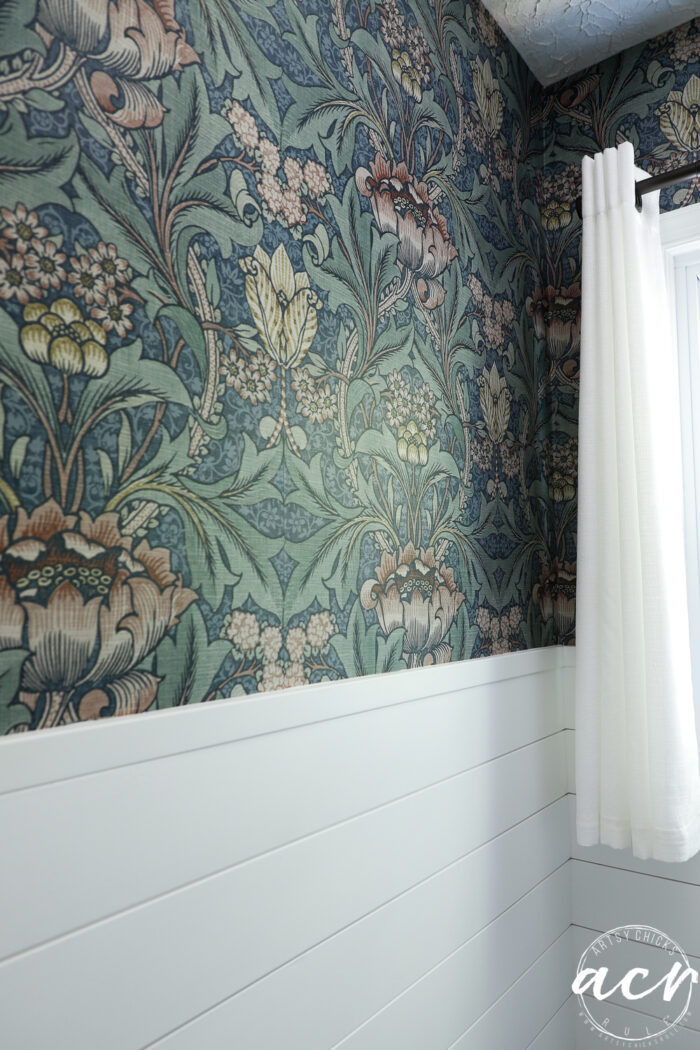
Here’s the one I chose…
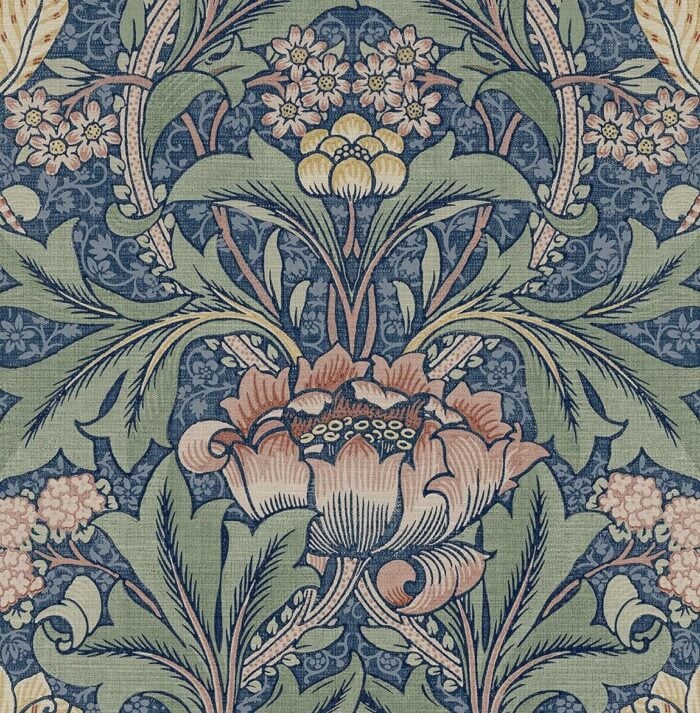
I liked the colors and I liked the design. You can find it >>>here.
Remove everything from the walls
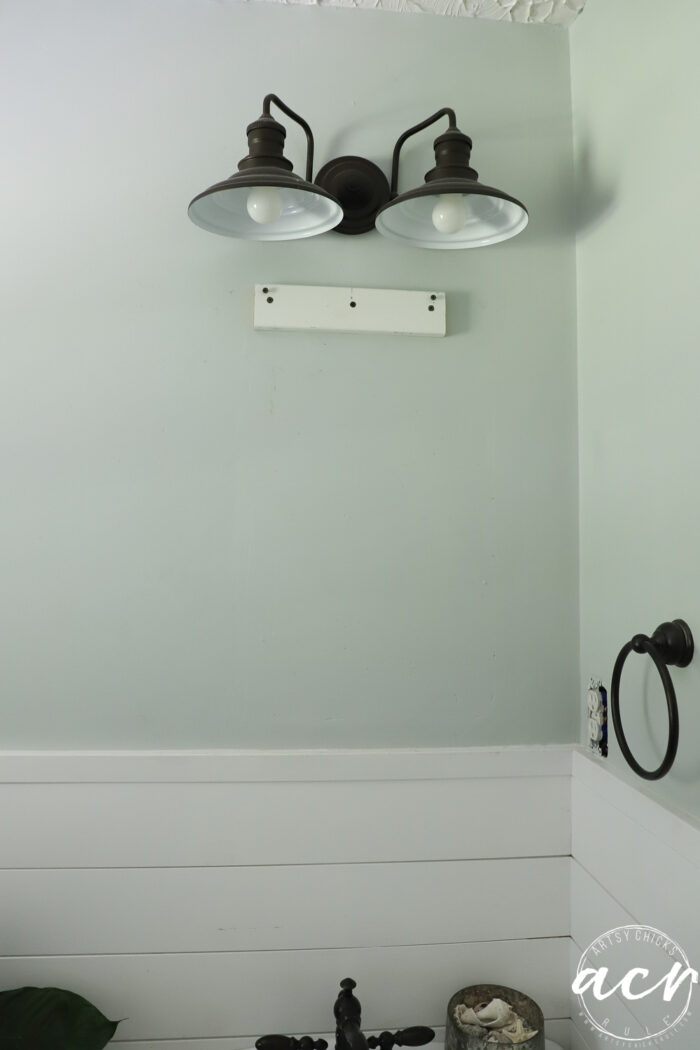
I took the mirror down and I actually loosened up the light fixture so it was away from the wall. (I turned off the circuit breaker too)
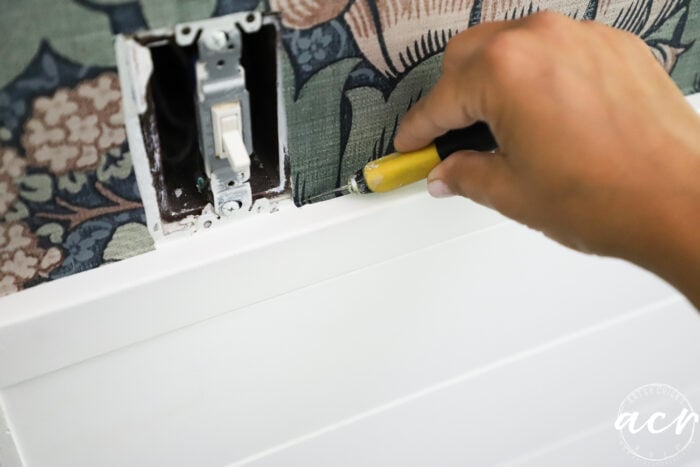
Don’t forget lightswitch plates, etc.
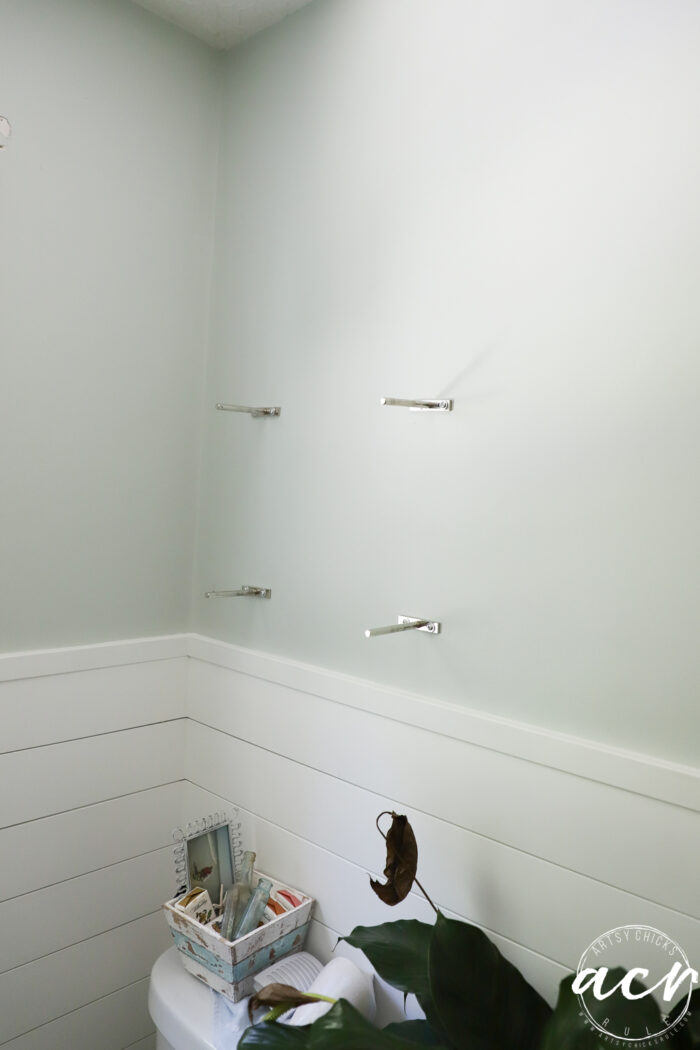
I also ended up taking these brackets for the floating shelves off too. I had thought I’d work around them.
Trust me when I say, take it all off!! It will make your job SO much easier.
Clean the walls
I filled the holes for the canvas print I had on this wall…
I knew I wouldn’t be hanging it back up here so I filled them.
I’m thinking I will leave it blank for now.
I also wiped the walls down with alcohol and a old tshirt before beginning.
Cutting and hanging
For the first piece, I measured the wall leaving adding an inch or two overlap.
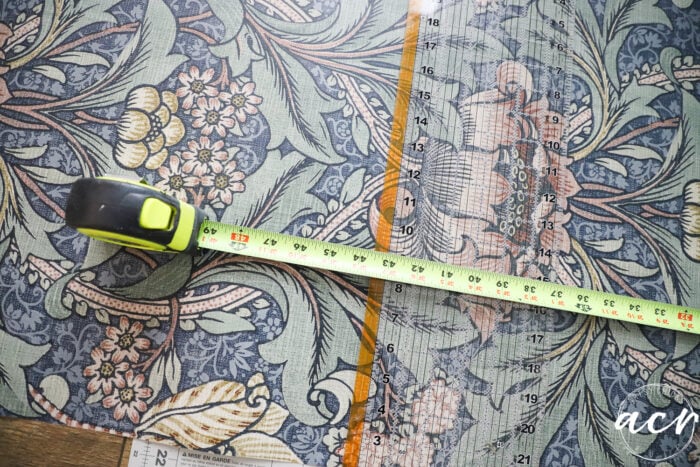
I used my cutting mat for every cut. You can find it here.
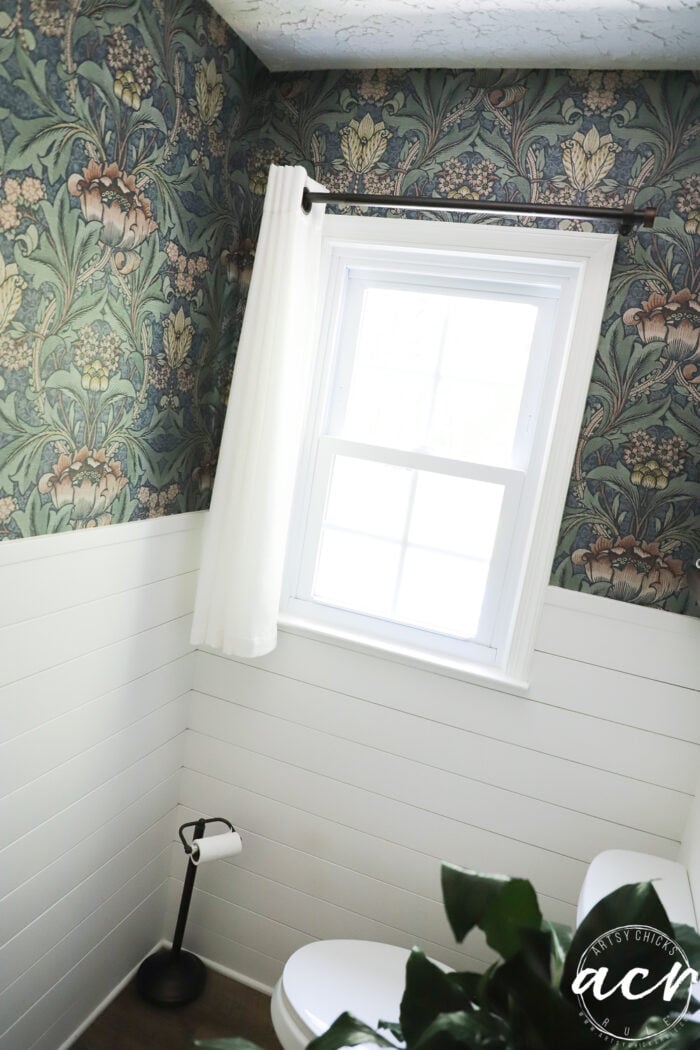
I hung it to the right of the door of the bathroom to begin. (so that I would end in the “far” corner on the other side of the door)
You’ll want to end in a place less conspicuous in case your pattern does not match up at the end. Which it most likely will not.
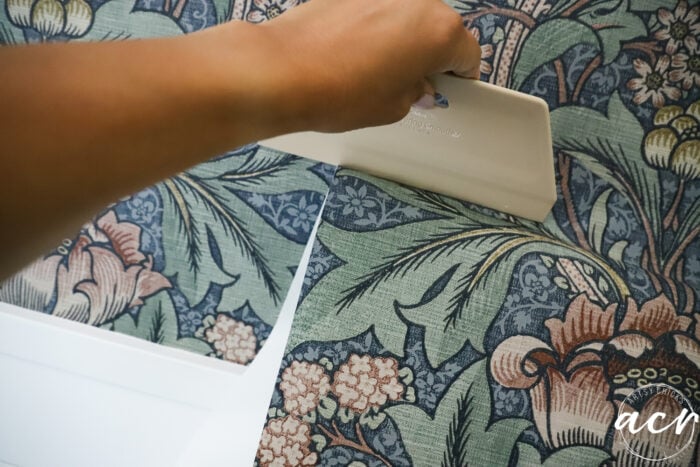
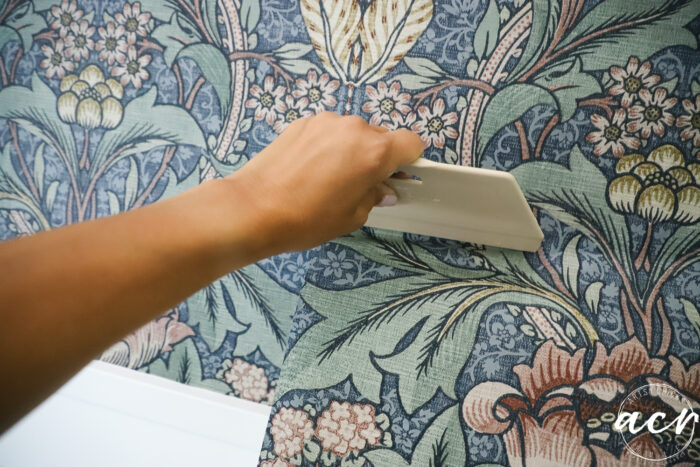
I used my wallpaper smoothing tool to scrape down the paper and remove air, etc.
Trimming
I cut the bottom with an X-Acto knife.
This just makes applying it so easy. Just cut an inch or two longer than you need (don’t forget to match your pattern and then measure from there…then add the extra inch or two!)
When adding the next sheet, be sure to match the pattern and overlap the seams a bit. Approx. 1/16 of an inch.
The reason for overlapping is to account for slight changes in temperature which could created shrinkage, etc., so not to have gaps.
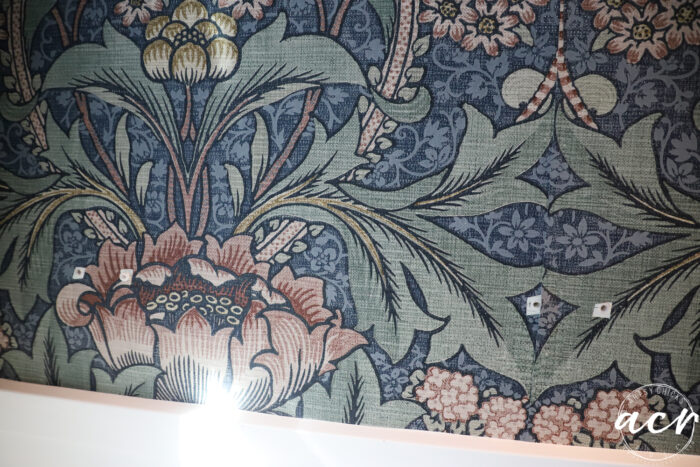
Here’s a seam, right down the middle of the yellow flower. Very hard to see!
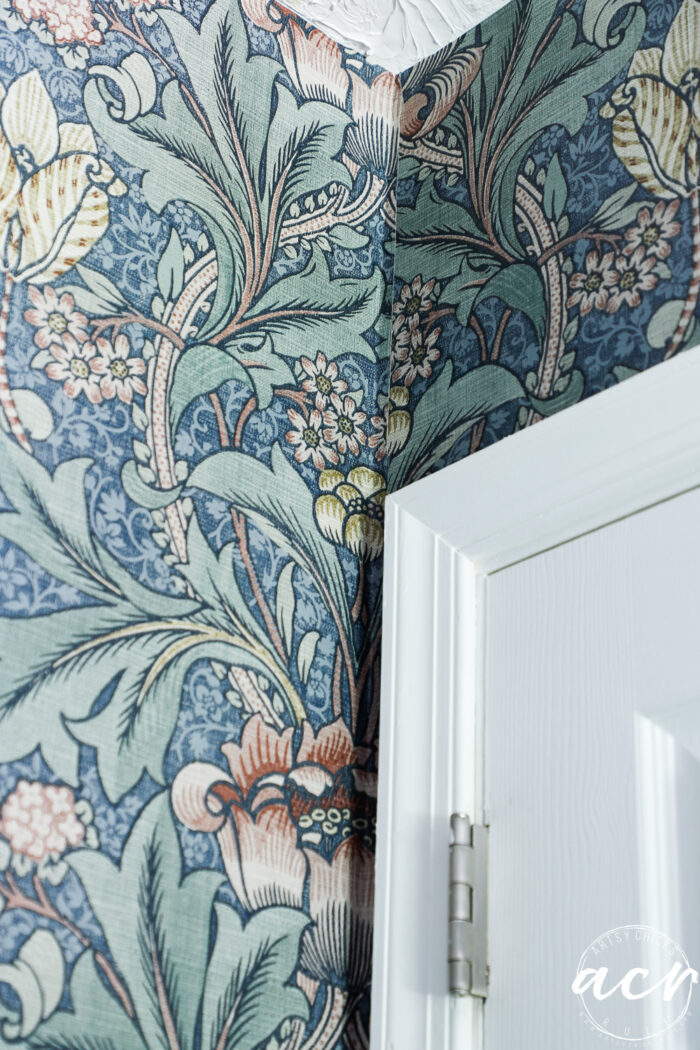
Corners
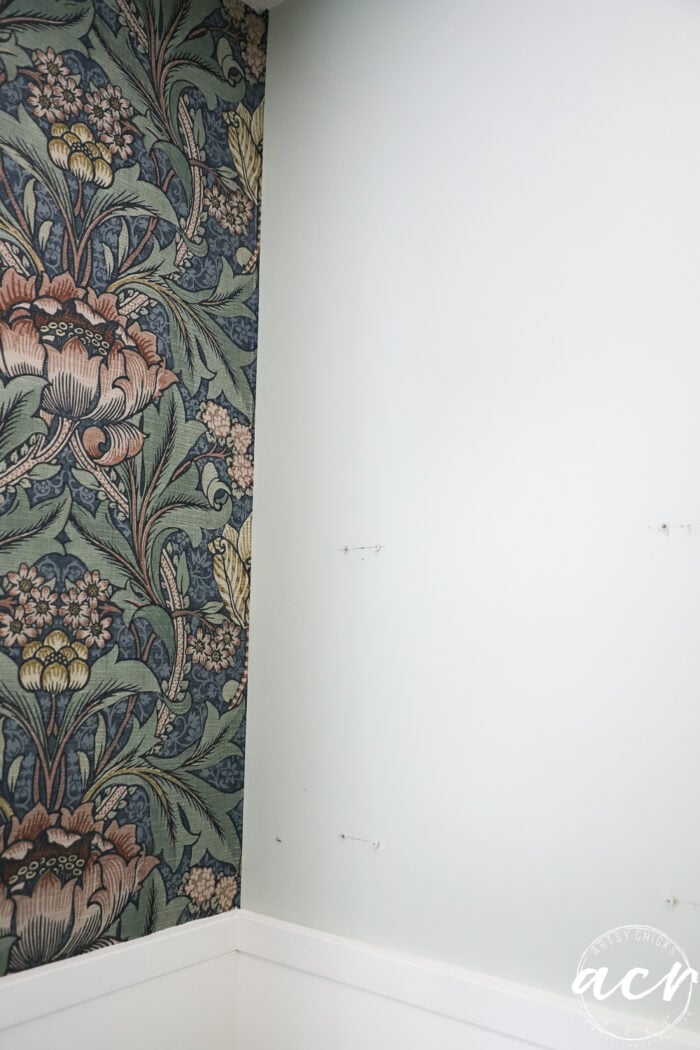
When doing corners, I overlapped the corner by about 1/2-1 inch. It’s so much easier to overlap it onto the next wall than trying to get a nice straight seam in the middle of the corner. This way you can start again with a new panel on the next wall right next to that small overlap.
Be sure to cut around your holes for easier finding when you put things back up. PLUS you want your paper smooth around them, so don’t try to just simply paper over top of them.
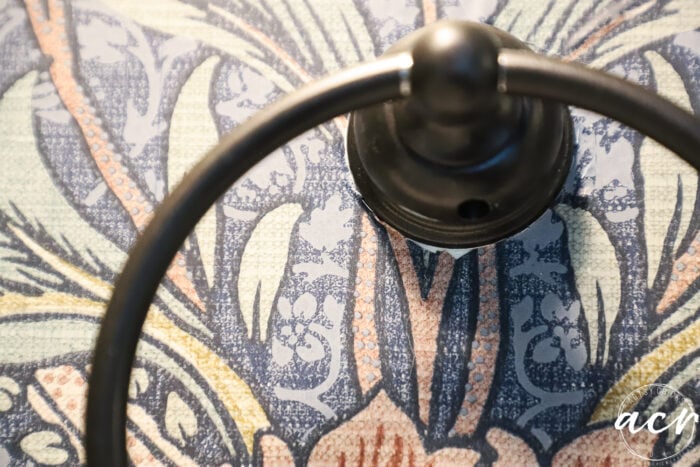
Issues that may come up
This was the only thing I could not remove. And do you want to know why?? Because I glued it with E6000 glue to the wall. Haha!
It was soooo wobbly and I could not get it tight so I said to heck with that a few years back and just glued it. And now that sucker is not going anywhere!! lol
So, obviously I was going to have to work around it.
Not fun but I made it work.
And by made it work, I mean that I tried to cut around the round part (didn’t work) and so next I try to cut a small section and pull the ring through (didn’t work). Then I actually ended up ripping the paper…oops. But happy surprise, it worked!!
I’m pointing to the jagged ripped paper put back together under the ring…you can NOT even tell. It came together perfectly.
BUT…
I had some yucky cuts around the attached portion.
See the white where it’s not quite seamless?
And this one. Boo.
So I pulled out some blue paint and a small paintbrush and touched it up that way.
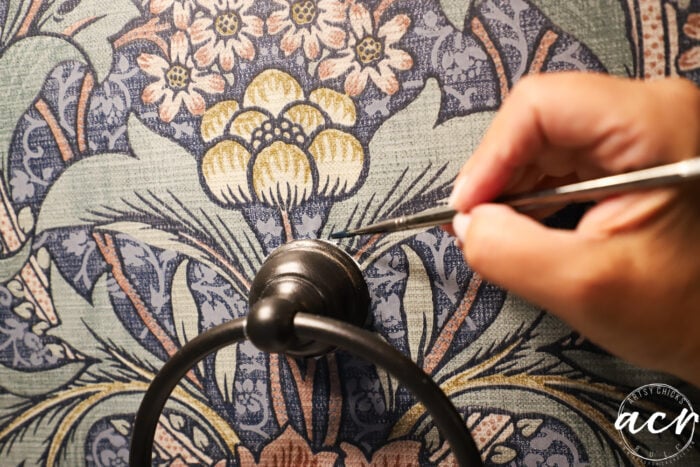
It worked great!
Finishing up
For the final piece, I ended up in this corner as I mentioned above.
And no, it does not match pattern but it’s okay. It’s really not noticable in this corner. See?
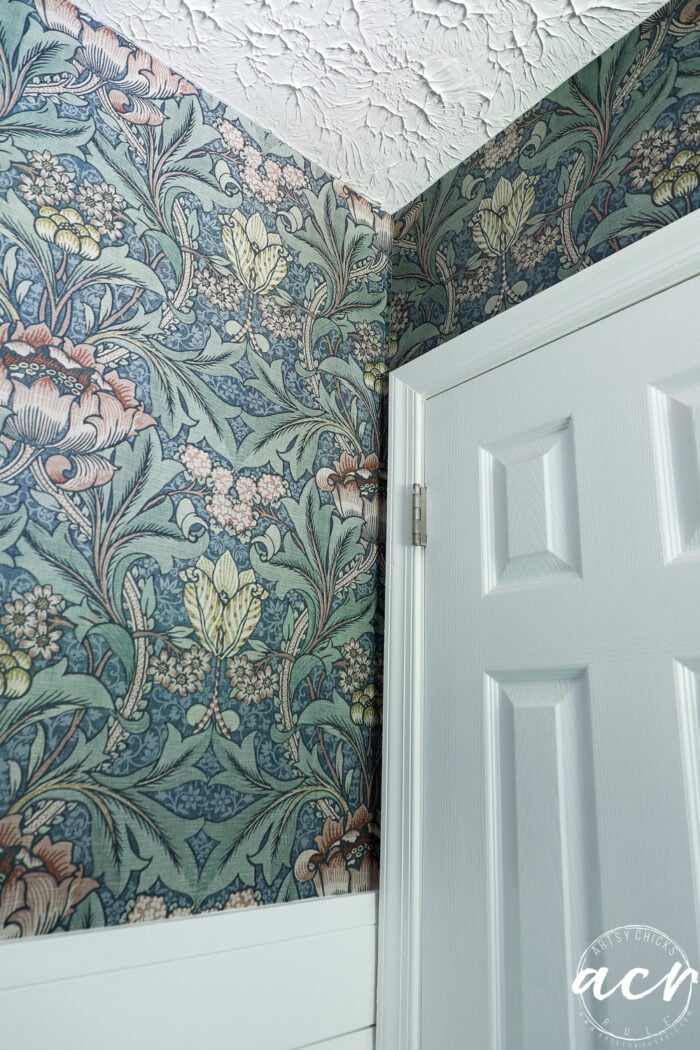
And that’s it, done!!
Welcome to the Jungle room as my sweet husband called it!! haha!!
I love it! It’s so fun and different.
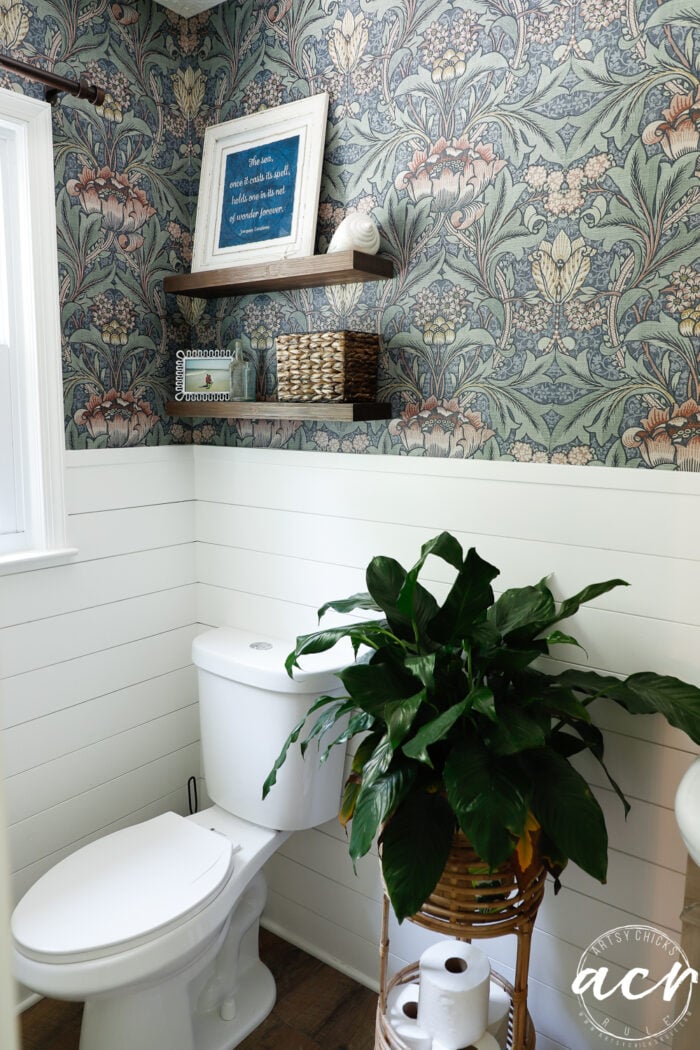
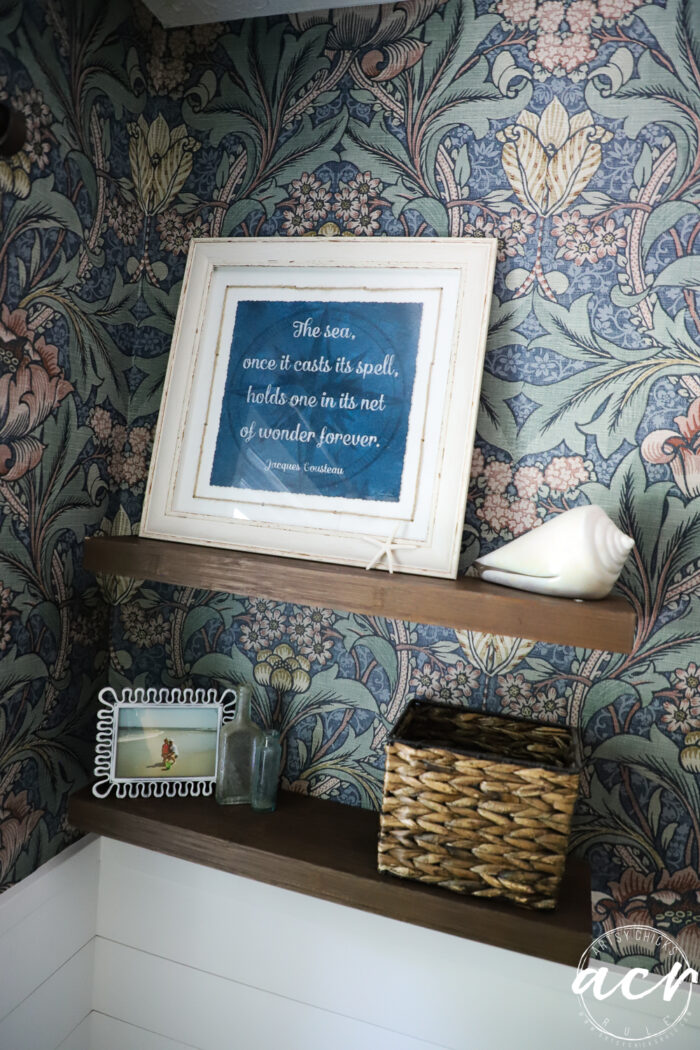
I’m probably going to change the decor on the shelves since that’s what I had up there before. (except that small basket, it’s new-thrifted)
I’ll update this post if I do!
I’m going to keep this wall empty for the time being, or maybe forever. There’s a lot going on with this paper so I don’t think anything needs to be here.
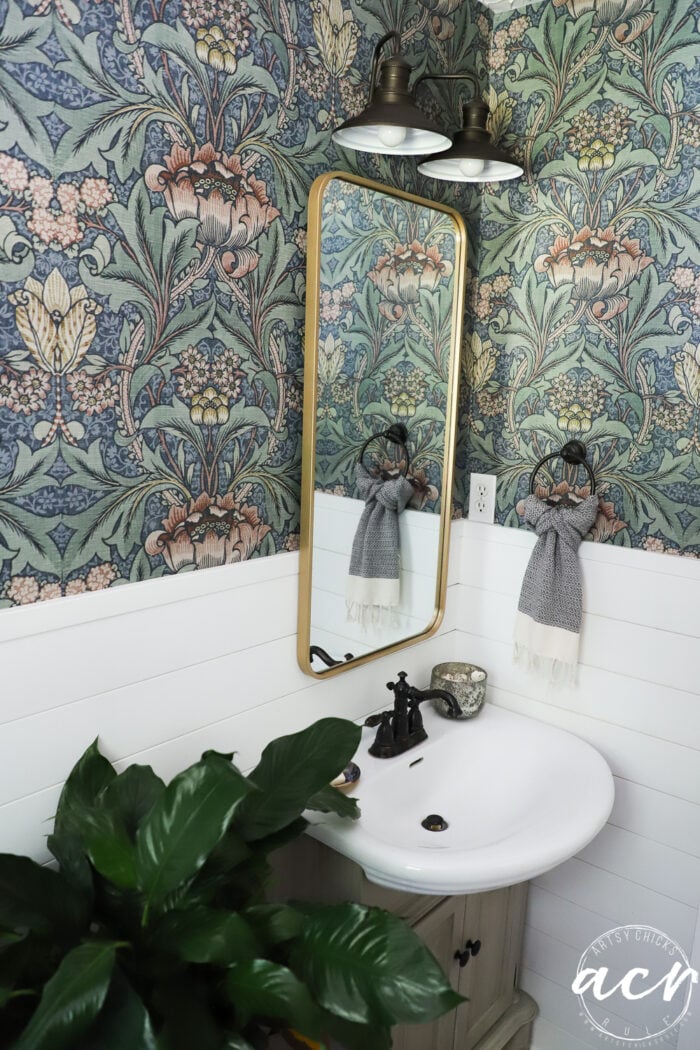
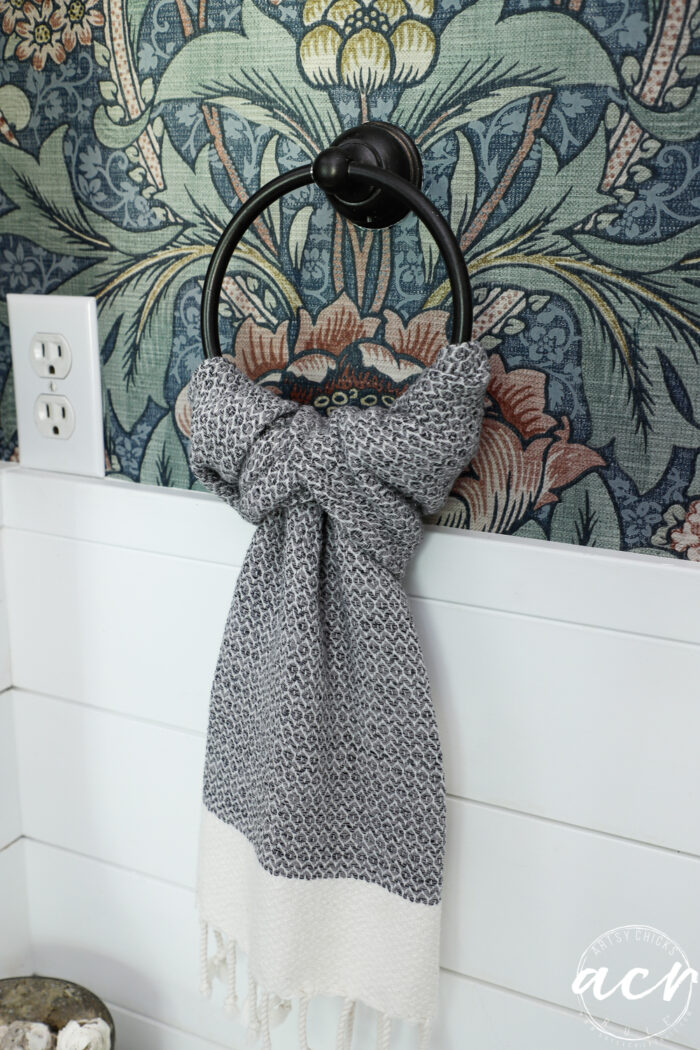
I just love these long tea towels.
I’m thrilled with the new look. And even more thrilled knowing that if I decided I don’t love it anymore, I can simply peel it right back off!
What do you think? Do you like my choice?? I kind of have a feeling this is going to be a “love it” or “hate it” project!! 😉
Either way, do you think you’d give peel and stick wallpaper a try??
PIN it to save it!
I hope you have a wonderful weekend!
xoxo


