I know what you’re thinking, and before you let the number 12 intimidate you, just know that many of these steps are connected and will feel like one. In a short number of weeks, it’ll all be over too! Moving out of your old spaces is the final leap before our team starts to make your dreams come true.
We’ve all moved a handful of times in our lives at this point. Whether it was going off to college, moving in with roommates as you start your career, or moving in with your partner. Moving doesn’t feel new anymore and hopefully, you feel like you’ve gotten the hang of it. We all have our processes and ways we like to order packing, cleaning, and hauling. Moving before a remodel though, is a little bit different. This time you are moving out of your space, for only a short period of time, and then back into it only this time the space will look and function much better.
When you move into a new home you have seen it before so you can anticipate how your move will go and what your stuff will look like in that space. With a remodel, you are relying on the trust of your designer and some 3D deliverables.
We spoke with our project managers about how they prepare their clients for a pre-construction move and listed below are all the details they shared with us (and a printable version at the very end).
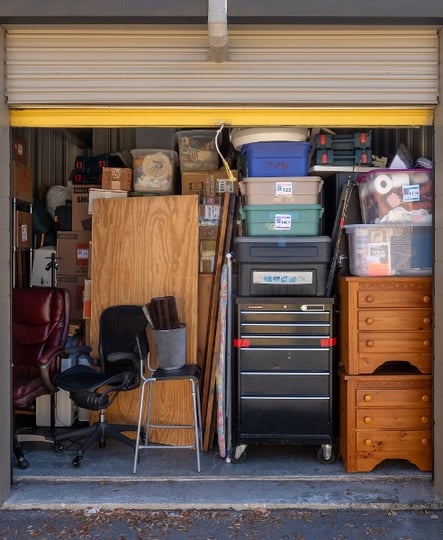
1. Find a short-term rental and a storage unit
Short-term rentals can be spendy. We recommend starting your search by first considering parents, relatives, or close friends. We even had clients who were able to stay in their neighbor’s house during their remodel since the neighbors spent 4 months out of the year in another state.
As a last resort, you can consider subletting an apartment, or signing a 6-month lease somewhere if you are taking on a house lift or 2nd story addition.
2. Plan the “how” (find boxes, hire movers, reserve a truck)
How will you take care of your move? To pack you need boxes. Will you buy them new or will you try to source them from market place, local neighborhood groups, or grocery stores? Next, you’ll need to plan how those boxes will get moved. you could hire movers, do it yourself, or perhaps pay your teens and their friends in pizza in exchange for some light labor. Hopefully, you have a large vehicle or you may need to rent a truck or storage container to be shipped away for a few months.

3. Make a furniture checklist (what to keep and what you’ll need to sell)
This task can be both thrilling and challenging. Simplify your move by letting go of larger items that you no longer want in your new space. Perhaps it’s the perfect opportunity to upgrade that couch with the cat’s scratch marks or the dining table that bears heat marks.
We usually see a mix of some clients keeping all their old furniture if they already have pieces they love or they choose to start completely over with new investment pieces that will compliment their new basement or primary suite.
Start with a pad of paper and go through each room labeling the furnishings you’ll keep vs. sell. After you’re done, stage, photograph, and post!
4. Set a budget for your post-renovation furnishings
Now that you have a clear idea of the items you’ll be selling or donating, it’s time to consider what you’ll need to replace. While this doesn’t have to be an immediate task, it’s important to keep in mind that many home furnishing companies have longer lead times, particularly for custom orders. It’s a good idea to start estimating how much you’re willing to invest in decorating and furnishing your new space.
5. De-clutter while packing all non-essentials
As you start to pack up all the things you don’t use day-to-day, you can de-clutter as well. make a donation pile and a garbage pile and don’t be afraid to be generous! Letting unused belongings go is hard but also so freeing! Imagine a new house that looks and feels clean and clutter-free.
6. Donation and/or dump run
All the nonessentials are packed up! Hopefully leaving only some clothes, toiletries, and a few dishes and cookware out of the boxes. You have your garbage pile and your donation pile and woah! Both of them look mountainous! You may have to schedule a dump run! On a separate day, you should also plan to go down to your local donation center. Hopefully, you don’t live in the Ballard neighborhood because if you do, the goodwill donation line can extend down the street. For this, we definitely recommend planning ahead!

7. Move nonessentials into storage
To make the labor of moving less intensive, we recommend that you split up moving your belongings over several days. At this point you should move your nonessentials into the back of your storage unit, if you are taking your stuff to a short-term rental then you can use this time to figure out where you will store your things.
8. If you have a garden, move the plants you’d like to protect into a safe area of your yard where large machinery will not go
Typically, we advise all clients to move any garden plants at least 6 feet away from the house to allow space for machinery and subcontractors to move around the structure. If you are doing a dig-down, house lift, or a 2nd story addition, then there will be heavy machinery involved. Most of the yard surrounding your house will be flattened and stripped of anything green. You can prepare in advance by asking your project manager during your sub walk or pre-con meeting, which plants you should protect or re-locate. At this point you should have them all relocated.
9. Pause utilities like garbage, recycling, and wifi.
You won’t be there so no need to keep paying! Contact your internet, garbage, and recycling providers and have them all paused or disabled till you move back. Our team will use our own trach and recycling services when it comes to demolition.

10. Forward your mail
Almost to the end! If you’ve read this far, congrats on being a thorough and organized person! Online or down at the post office you can forward all of your new mail to your temporary address or place a hold and pick it up weekly. You may even decide to get a temporary PO box.
11. Pack up the rest of your belongings and move them to their designated places (storage or temporary rental)
The last few trips to the new place or storage unit will now take place. After this step, we highly recommend you treat yourself to your favorite restaurant because wow! You have earned it!
12. Make key copies for your contractor
During the Pre-con meeting, which will be about a week before production starts, you should have key copies made for your contractor. They will likely leave a lock box at the site for their lead carpenters, field support, and subcontractors to access the house.
3, 2, 1, Pack!
Keep in mind that not every project will require you to move out. projects that will require you to live elsewhere include: remodeling your only bathroom, basement dig-downs, house lifts, second-story additions, or whole-house remodels. To find out more, fill out the form below and we’ll be in touch asap!


